You bought the pretty stone, watched one quick video, and then dragged it across dry skin. Ouch, right? Learning how to use a gua sha properly feels much kinder than that first scratchy attempt.
This guide stays focused on one tool and one skill. First, you will choose a stone that suits your hands and skin. Next, you will learn oil, angle, pressure, and strokes area by area. Finally, you will clean the tool well and build a calm, realistic rhythm.
Honest expectations matter here, so let us set them early. A gua sha session can ease tension, soften morning puffiness for a while, and help you slow down. In contrast, no stone can lift a face permanently or replace medical care. Gentle technique, repeated calmly, gives you the real reward.
Which stone should you choose first?
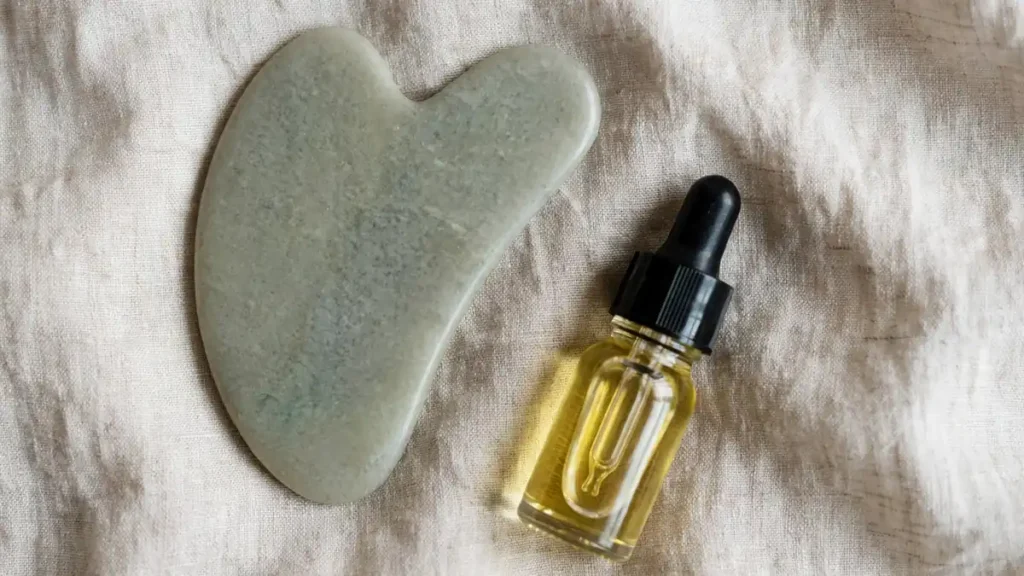
Start with feel, not hype, when you compare gua sha stone types. Natural stone feels cool, smooth, and pleasantly heavy in your palm. Stainless steel feels cooler still, stays sturdy, and suits anyone who drops things often. Meanwhile, resin tools feel light and cheap, though some edges can feel slightly rough.
The classic jade vs rose quartz gua sha debate comes down to preference. Jade often feels a little cooler and firmer against skin. Rose quartz often holds a soft warmth after a few strokes, and many people love its pink colour. However, neither stone gives magically better results than the other.
Your hands decide more than the mineral ever will. Pick a tool that feels balanced, smooth, and easy to grip when your fingers get oily. Check every edge under good light before your first session. Consequently, a tiny chip matters, because a rough edge can scratch delicate skin fast.
Temperature offers another simple clue. Cold stone feels refreshing on a puffy morning face, especially around the eyes. At night, however, a stone warmed briefly in your palms can feel deeply soothing. So, test both moments before you judge your new tool.
What do the different gua sha tool shapes do?
Most gua sha tool shapes share the same heart-like outline. One long, smooth edge glides beautifully across cheeks, forehead, and neck. Two small bumps, often called the double notch, hug the jawline and brow bone neatly. Meanwhile, a short curved edge fits under the eyes and around the nose.
Some tools add a comb edge with tiny teeth. That textured side suits the scalp line and larger neck muscles better than the face. A pointed tip, in contrast, presses gently into tight spots beside the nose or jaw. Still, the point never needs force to feel useful.
Confused by a fancy multi-edge design? Keep things simple for your first month. Learn the long edge, the notch, and the short curve really well. Afterwards, extra shapes will feel like bonuses rather than puzzles.
Why does facial oil for gua sha matter so much?
Slip is the whole secret behind a comfortable session. Facial oil for gua sha lets the stone glide, so skin stretches far less. Dry dragging, in contrast, pulls, reddens, and quickly ruins the calm mood. Therefore, never start stroking on a bare, freshly washed face.
Choose a plain facial oil that your skin already tolerates well. A lightweight plant oil suits most people, especially on warm Dubai evenings. Heavier oils feel lovely on very dry cheeks, though they can feel sticky in humidity. For example, your usual moisturiser alone may feel too grabby under a stone.
Wondering how much oil is enough? Start with three or four drops, warmed between clean palms. Press the oil over your face and neck, rather than rubbing it in fully. Then, add one extra drop whenever the stone starts to catch or skip.
Your shopping trip can stay simple, by the way. A helpful Dubai shopping guide can point you toward the right stores for a smooth stone and a plain facial oil. After that, your existing skincare shelf probably covers everything else.
How do you prep your skin, hands and space?
Clean skin gives you the cleanest, calmest start. Wash your face with your usual gentle cleanser, then pat it dry softly. Next, wash your hands well, because your fingers will hold skin taut throughout. Tie long hair back, too, so strands stay out of the oil.
Comfort shapes your technique more than you might expect. Sit in front of a mirror with both elbows supported on a table. Good light helps you watch the angle and spot any redness early. Consequently, a relaxed posture stops you from pressing harder without noticing.
Take three slow breaths before the first stroke. Drop your shoulders, unclench your jaw, and soften your forehead on purpose. That tiny pause turns a skincare step into a genuine wind-down ritual. Indeed, your face often mirrors the tension in your body.
What gua sha pressure and angle feel right?
Hold the stone almost flat against your skin. Good gua sha pressure and angle means roughly forty-five degrees or less, never upright like a scraper. The edge should kiss the skin, while the flat side rests close to it. In fact, a flatter angle always feels smoother and safer.
Pressure stays light to medium across the whole face. Think of stroking a peach without bruising it, and you have the right image. Under the eyes, though, pressure drops to almost nothing at all. Meanwhile, the neck and jaw can accept a slightly firmer touch.
Use your free hand as an anchor on every stroke. Place two fingers just ahead of the stone, and hold the skin gently still. That simple trick stops dragging and makes each glide feel controlled. Therefore, slow hands always beat fast, forceful hands.
Pain is information, never a goal. Stop at once if a stroke stings, burns, or leaves a sharp red line. Mild warmth and a soft pink flush, in contrast, feel normal for many people. So, let comfort set your limit every single time.
Why do you always start with the neck?
Every good routine opens the neck before touching the face. Strokes on the face move fluid downward, so the neck needs attention first. Think of clearing the exit route before you tidy a room. That order makes the whole lymphatic drainage face massage idea feel logical.
How do you do gua sha for the neck?
Begin gua sha for the neck with the long edge below one ear. Glide slowly down toward your collarbone, following the side of the neck. Repeat that stroke five times, keeping the angle flat and the pressure light. Then, switch sides and match the same slow count.
Work the front of the neck with extra care. Use feather-light strokes down the centre, and avoid pressing on the throat itself. The back of the neck, however, welcomes the comb edge or the long edge. Firmer strokes there can ease desk-day tightness beautifully.
Hydration supports this gentle routine from the inside, too. A balanced plate, like the ideas in this balanced diet guide, helps your skin feel comfortable day to day. Likewise, a few bites of something naturally nourishing, such as the fruit covered in this dates benefits guide, can round out a calm evening ritual.
Gua sha for jawline: how do you follow the bone?
Place the double notch right at the centre of your chin. For gua sha for jawline work, the notch should straddle the jaw bone snugly. Glide outward toward your earlobe in one slow, smooth motion. Then, repeat five times before you move to the other side.
Keep your mouth relaxed while you work the jaw. Many people clench without realising it, especially after long screen hours. A slow stroke plus a soft exhale can release that tight, tired feeling. Still, grinding pain or clicking joints deserve a professional opinion, not more pressure.
Finish each jaw pass with a downward neck stroke. Sweep from below the ear straight down to the collarbone. That finishing move follows the same downward direction as your opening strokes. Consequently, every area connects into one tidy sequence.
Gua sha for cheeks: which direction works best?
Start gua sha for cheeks beside your nose, using the long smooth edge. Sweep outward across the cheekbone toward the front of your ear. Lift the motion very slightly upward, without pulling the skin itself up. Next, repeat the same path five slow times.
Move to the lower cheek for your second pass. Begin near the corner of your mouth, then glide outward toward your earlobe. Shorter strokes suit the area under the cheekbone, especially with the curved edge. For instance, three short glides can feel better than one long drag.
Notice how your cheeks respond as you go. Some people flush pink quickly, while others barely change colour at all. Both responses can be perfectly normal, so never chase redness on purpose. Instead, chase smoothness, warmth, and an easy glide.
How do you treat the under-eye area gently?
Treat the under-eye zone like silk, because the skin there is thin. Use the short curved edge, or even the smooth back of the stone. Rest the tool just below the inner corner, barely touching the skin. Then, sweep outward toward your temple in the slowest stroke of all.
This gentle pass is where gua sha for puffiness earns its fans. Cool stone plus light outward strokes can calm a swollen morning look for a while. Keep your expectations honest, though, because salty dinners and short sleep still show. Nevertheless, five patient strokes can make concealer sit more smoothly later.
Never press upward into the eye itself. Keep every stroke on the bone that rings the eye socket. Stop immediately if the skin stings or your eyes water. Indeed, less pressure almost always wins in this delicate spot.
Gua sha for forehead: how do you finish the top?
Begin gua sha for forehead strokes between your brows, using the long edge. Glide upward toward your hairline in slow, even lines. Cover the centre first, then move outward across one side at a time. Afterwards, your whole forehead will feel warm and awake.
Try horizontal strokes for a second forehead pass. Start above one brow, then sweep across toward the opposite temple. The double notch can also hug the brow bone with feather-light pressure. Meanwhile, hold the skin at the hairline steady with your free hand.
End the face sequence at your temples. Circle the stone there twice, very gently, and breathe out slowly. That quiet finish signals the end of the routine to your whole body. Finally, sweep down each side of the neck once more.
How often to use a gua sha without overdoing it?
Beginners do best with three or four sessions a week. Short, gentle practice teaches your hands the angles far better than one long session. Ten calm minutes is plenty, and five minutes still counts on busy days. Therefore, consistency matters much more than marathon routines.
Daily use suits some people, as long as pressure stays light. Watch your skin for a week before you increase the frequency, though. Soreness, breakouts along stroked areas, or lasting redness all suggest a step back. So, how often to use a gua sha really depends on your skin’s feedback.
Rest days help you notice real changes, too. Compare how your face feels on off days versus session days. A simple phone note after each week keeps your impressions honest. In this way, your routine grows from evidence, not guesswork.
Is gua sha morning or night better for you?
The gua sha morning or night question has no single winner. Morning sessions suit puffiness, because the cool stone wakes your face up fast. Evening sessions suit tension, because slow strokes help you unwind before bed. Ultimately, the best slot is the one you actually keep.
Try gua sha before makeup on a morning when your face feels swollen. Finish the routine, let the oil absorb, and then blot any extra shine gently. Your base will glide on more evenly over calm, smooth skin. For a full morning routine that follows, these sweat-proof makeup tips pair beautifully with a depuffed base.
Night sessions pair well with a slower pace and dimmer light. Keep the stone beside your evening skincare, so the habit stays visible and easy. Some people even bookend a relaxing weekend with a spa day from this things to do in Dubai guide or a calmer outing in this things to do in Sharjah guide. Either way, your home routine remains the steady core.
Gua sha vs jade roller: which tool suits you better?
The gua sha vs jade roller choice depends on what you enjoy. A roller moves fast, feels simple, and covers large areas with almost no learning curve. A gua sha stone, in contrast, offers shaped edges that follow curves and angles precisely. Consequently, the stone rewards slower, more deliberate hands.
Rollers feel lovely for a quick morning depuff over a sheet mask. Gua sha feels better when you want control around the jaw, brows, and cheekbones. Neither tool outperforms the other in any dramatic, proven way. Honestly, the tool you use three times a week wins.
Storage and cleaning also differ a little. A roller has moving parts that trap oil around the metal frame. A flat stone, meanwhile, washes clean in seconds with no fiddly joints. That simplicity quietly helps many people stay consistent.
How does this fit with lymphatic drainage ideas?
You will hear lymphatic drainage face massage mentioned wherever gua sha appears. In simple wellness terms, gentle strokes encourage surface fluid to move toward the ears and neck. That is why your routine starts and ends with downward neck strokes. The idea stays general, though, and never counts as medical treatment.
Direction matters more than force in this approach. Always move outward across the face, then downward along the neck. Random back-and-forth scrubbing, in contrast, just pulls the skin around. Slow, one-way strokes keep the whole practice calm and purposeful.
Skip the stone when your skin feels unwell. Active breakouts, sunburn, rashes, cuts, or recent facial procedures all call for a pause. Let the skin settle fully, and ask a professional when you feel unsure. Indeed, patience protects your results better than enthusiasm does.
How to clean a gua sha stone after each session?
Cleaning takes one minute, so never skip it after a session. Learning how to clean a gua sha stone properly also protects your skin from old oil and residue. Wash the tool with warm water and a drop of gentle soap. Rub every edge with your fingers, including the notch and curves.
Dry the stone fully with a soft, clean towel. Water spots can linger on natural stone, and damp storage invites musty smells. Lay the tool flat, rather than standing it on a narrow edge. Then, store it in a soft pouch or a lined drawer section.
Stainless steel tools tolerate a slightly deeper clean. You can wash them the same way, and they will not chip if dropped. Natural stone, however, can crack on hard bathroom tiles in one fall. So, handle your stone over a towel whenever you can.
Sharing tools is a habit worth dropping. Skin bacteria and oil move easily from one face to another. Keep your stone personal, just like a toothbrush or a face cloth. That one boundary keeps a relaxing ritual hygienic, too.
Which gua sha mistakes quietly ruin your results?
Most gua sha mistakes come from enthusiasm, not carelessness. Dry skin stroking tops the list, because friction alone can leave you sore and red. Pressing too hard comes next, especially along the jaw and neck. Remember, bruises are never proof that a session worked well.
Wrong angles cause another common problem. An upright stone scrapes, while a flat stone glides and soothes. Rushing also ruins technique, because fast strokes skip the anchor hand completely. Slow down until each pass takes about three full seconds.
Dirty tools quietly undo good skincare. Old oil and dead skin ride back onto a freshly washed face every time. Skipping the neck is another classic slip, since face strokes then lack their opening step. Therefore, treat prep and cleaning as part of the technique itself.
Expecting instant, permanent change disappoints almost everyone. Photos online often use lighting, angles, and a freshly depuffed morning face. Your real wins look quieter: less tension, calmer evenings, and smoother makeup days. A fresh glow-up pairing, like the styles in this bob haircuts for women guide, can complete that cared-for feeling nicely.
Frequently asked questions
Can you use a gua sha every day?
Yes, many people can, provided every session stays light and short. Start with three or four days a week, then watch your skin closely for a fortnight. Add days only when your face feels calm, comfortable, and never sore afterwards.
Which stone is better for beginners?
A smooth stainless steel tool forgives drops and washes easily, so beginners often love it. Natural stone feels cooler and heavier, which some hands find easier to control. Choose whichever tool you will actually pick up on a tired evening.
Do you use a gua sha before or after moisturiser?
Use the stone after oil, and treat moisturiser as an optional step before that oil. Thick creams alone can feel grabby, so the stone may drag instead of gliding. A few drops of oil on top restore the slip you need.
Can gua sha help with morning puffiness?
A cool stone and gentle outward strokes can reduce a puffy look for a short while. Keep the stone in a clean pouch in a cool spot for extra refreshment. Sleep, salt, and allergies still shape puffiness far more than any tool does.
Should you use a gua sha on breakouts?
No, skip active, sore breakouts and stroke only calm, unbroken skin instead. Dragging a stone over inflamed spots can spread irritation and slow healing down. Wait until the area settles, and clean the tool extra carefully before returning.
How long does one full routine take?
A complete routine takes about ten minutes once your hands know the sequence. Beginners often need fifteen minutes, because checking angles in the mirror slows things down. Five focused minutes on the neck, jaw, and cheeks still delivers a calm, worthwhile session.